Growing peanuts in containers is an exciting way to cultivate a nutritious crop, even if you have limited space. Here’s a simple step-by-step guide to help you grow peanuts in pots successfully.
Why Grow Peanuts in Pots?
- Space Efficiency: Perfect for small gardens or urban settings.
- Mobility: You can move containers to the sunniest spots.
- Pest Control: Easier to monitor and control pests.
- Convenience: Harvest fresh peanuts right from your balcony or patio.
Step 1: Choose the Right Peanut Variety
For container gardening, Valencia or Spanish peanuts are ideal due to their smaller growth habits and shorter growing seasons.
Step 2: Select the Right Container
- Size: Use a pot at least 12 inches deep and 18 inches in diameter to provide enough space for roots and peanuts to develop underground.
- Material: Clay, ceramic, or plastic containers work well. Ensure the pot has good drainage holes to prevent waterlogging.
Step 3: Prepare the Soil
Peanuts prefer loose, well-draining soil. Create a mix of:
- 1 part potting soil
- 1 part compost
- 1 part sand (to aid drainage and mimic natural conditions)
Step 4: Plant the Peanuts
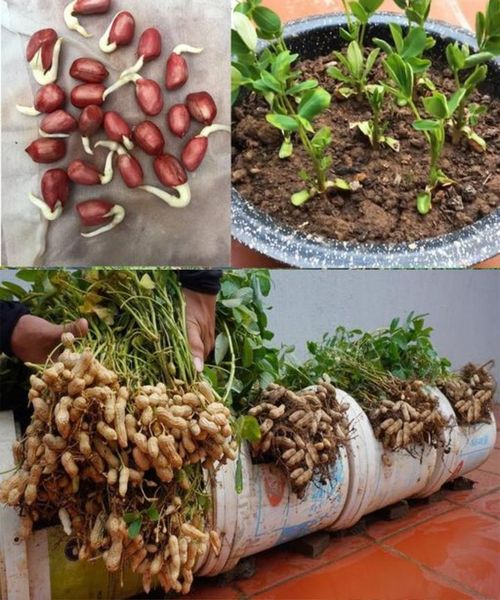
- Soak Seeds: Soak raw, unroasted peanut seeds in water overnight.
- Planting: Remove the seeds from their shells, plant them 1-2 inches deep, and space them 6-8 inches apart. Cover them lightly with soil.
- Location: Place the pot in a sunny area that receives 6-8 hours of sunlight daily.
Step 5: Care for Peanut Plants
- Watering: Keep the soil consistently moist but not soaked. Water deeply when the top inch of soil dries out.
- Fertilizing: Peanuts are light feeders. Apply a balanced organic fertilizer once a month, especially in containers where nutrients deplete quickly.
- Mulching: Add mulch once plants are a few inches tall to retain moisture and suppress weeds.
Step 6: Understanding Pegging
Peanuts have a unique process called pegging, where flower stems bend down and push into the soil to form peanut pods underground. Keep the soil loose to allow this process.
Step 7: Harvesting
Peanuts are ready for harvest when the plant turns yellow and dies back (after 120-150 days).
- Loosen the soil: Use a hand trowel to gently loosen the soil around the base.
- Pull the plant: Lift the plant, shaking off excess dirt.
- Cure the peanuts: Hang the plants upside down in a dry, warm place for a few days to cure. Then, remove and further dry the peanuts for storage.
Step 8: Enjoying and Storing
- Once fully dried, enjoy your homegrown peanuts roasted, boiled, or raw.
- Store in a cool, dry place to keep them fresh.
Tips for Successful Peanut Growth in Pots
- Rotate the pot: Turn the pot every few days to ensure even sunlight exposure.
- Check for pests: Look out for aphids or spider mites. If needed, use organic insecticidal soap.
- Replenish soil: If growing multiple crops, mix in fresh compost or potting soil to maintain nutrient levels.
By following these steps, you can grow your own peanuts at home and enjoy the satisfaction of harvesting your very own crop!