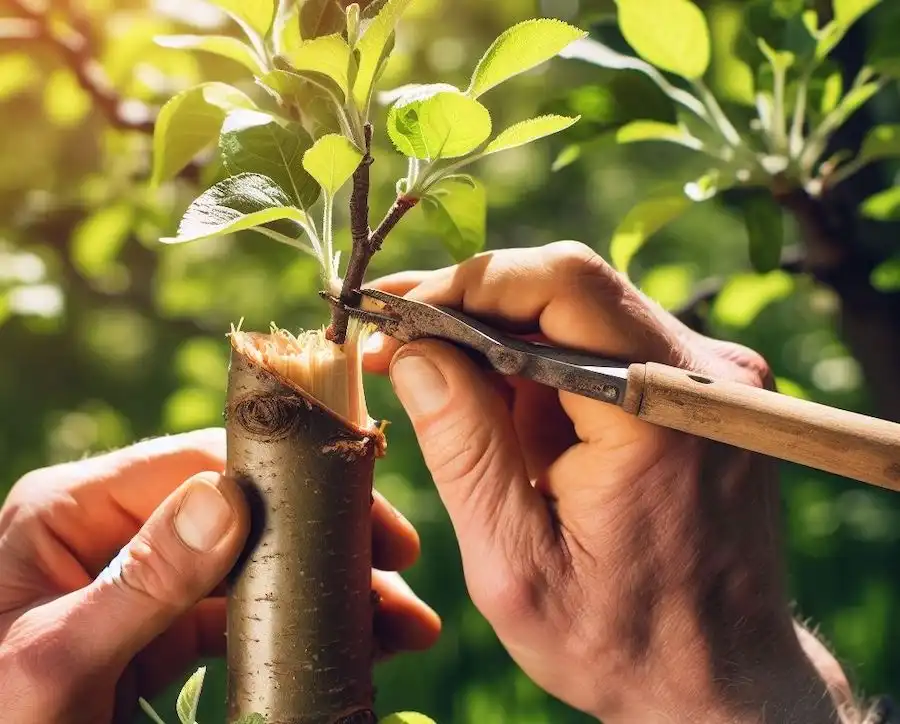
Grafting is a sophisticated horticultural technique that involves joining parts from two plants so they grow as one. This method is commonly used in fruit tree propagation to combine the desirable traits of both the rootstock and the scion, such as improved disease resistance, better fruit quality, or increased vigor. Here’s a detailed guide on how to graft trees correctly and efficiently, with a focus on the under-the-bark grafting method.
What You’ll Need
- Scion Wood: A healthy, disease-free shoot from the desired plant variety. The scion should be from the current season’s growth.
- Rootstock: The plant or tree onto which the scion will be grafted. It should be compatible with the scion and well-established.
- Grafting Knife: A sharp knife specifically designed for grafting.
- Grafting Tape or Band: To secure the graft and prevent moisture loss.
- Pruning Shears: For cutting the scion and rootstock.
- Sealant: Optional, such as grafting wax or paint, to protect the graft from disease and desiccation.
Steps for Grafting Under the Bark
1. Prepare the Scion
- Select Scion Wood: Choose a healthy piece of wood from the current year’s growth with several buds. It should be about the same diameter as the rootstock.
- Cut the Scion: Make a clean, slanted cut at the base of the scion, about 1-2 inches long. The cut should be smooth to ensure good contact with the rootstock.
2. Prepare the Rootstock
- Select the Rootstock: Choose a healthy rootstock of the same diameter or slightly thicker than the scion. Make sure it is well-established.
- Make a Cut Under the Bark: Using a sharp grafting knife, make a vertical cut through the bark of the rootstock, about 2-3 inches long. This cut should be deep enough to reach the cambium layer, which is the layer of growing tissue just beneath the bark.
3. Graft the Scion
- Insert the Scion: Gently lift the bark on either side of the vertical cut you made in the rootstock. Insert the base of the scion into the space created under the bark. Ensure that the cambium layers of both the scion and the rootstock are aligned, as this is crucial for successful grafting.
- Secure the Graft: Wrap the grafting tape or band tightly around the grafting area to hold the scion in place and keep moisture out. Make sure the tape or band is snug but not so tight that it damages the bark.
4. Seal and Protect
- Seal the Graft: Apply grafting wax or paint over the grafting area to protect it from diseases and desiccation. This step is optional but can help improve the chances of successful grafting.
- Monitor and Maintain: Keep the grafted area clean and monitor it regularly for signs of success or failure. Water the plant as needed and ensure it is not exposed to extreme weather conditions.
5. Post-Grafting Care
- Remove Tape: After a few weeks, when the graft has taken and new growth begins to appear, gently remove the grafting tape or band. Be careful not to damage the newly formed graft.
- Prune as Needed: Remove any competing shoots or unwanted growth to allow the grafted scion to develop properly. Pruning helps direct the plant’s energy towards the grafted scion and improves overall growth.
Benefits of Under-the-Bark Grafting
- Improved Compatibility: This method is often used for grafting plants with different diameters and is suitable for species that have difficulty joining by other methods.
- Better Success Rate: Grafting under the bark allows for better cambium layer contact, which can increase the success rate of the graft.
Tips for Success
- Timing: Perform grafting during the plant’s active growth season, typically in late winter or early spring before new growth starts.
- Clean Tools: Sterilize your grafting knife and other tools before use to prevent the spread of diseases.
- Proper Alignment: Ensure that the cambium layers of the scion and rootstock are aligned for a successful graft.
By following these steps and understanding the grafting under-the-bark method, you can successfully propagate fruit trees and other plants, combining the best characteristics of the rootstock and scion. This technique not only enhances the quality and productivity of your plants but also provides a valuable skill for any dedicated gardener or horticulturist.
