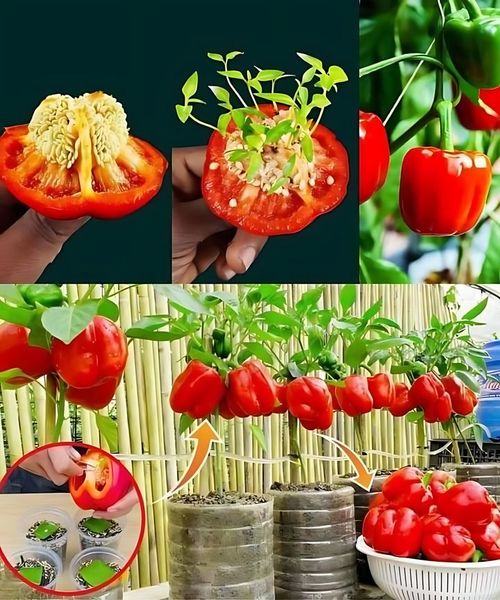
How to Grow Bell Peppers from Seeds in Recycled Plastic Bottles
Growing bell peppers from seeds in recycled plastic bottles is an eco-friendly and space-saving method, perfect for home gardeners looking to reduce waste while enjoying fresh produce. This guide will help you get started with minimal materials and effort.
Materials Needed:
- Empty plastic bottles (2-liter soda bottles work well)
- Bell pepper seeds
- Potting soil
- Compost (optional)
- Scissors or a utility knife
- Small shovel or spoon
- Watering can or spray bottle
- Labels (optional)
Step-by-Step Instructions:
1. Prepare Your Plastic Bottles
- Select and Cut the Bottle: Choose a 2-liter plastic bottle or a similar size. Using scissors or a utility knife, carefully cut the bottle about 1/3 of the way down from the top. The bottom part will serve as your planting container.
- Create Drainage Holes: Puncture a few small holes in the bottom of the bottle to ensure excess water can drain out, preventing root rot.
- Top Half (Optional): You can use the top half as a humidity dome. If you do, remove the cap to allow air circulation.
2. Fill the Bottle with Soil
- Base Layer: Place a layer of small stones or pebbles at the bottom of the bottle for improved drainage.
- Add Potting Soil: Fill the bottle with potting soil, leaving about 1-2 inches of space from the top. Mix in some compost for added nutrients if desired.
3. Plant Your Bell Pepper Seeds
- Moisten the Soil: Lightly water the soil before planting. It should be damp but not soggy.
- Sow the Seeds: Plant 2-3 bell pepper seeds about ¼ inch deep. Cover the seeds with a thin layer of soil and gently press it down.
- Labeling: If growing different varieties or tracking planting dates, label your bottles.
4. Create Ideal Growing Conditions
- Sunlight: Place the bottles in a sunny location that receives 6-8 hours of sunlight daily. If sunlight is limited, use a grow light.
- Moisture: Keep the soil consistently moist by misting with a spray bottle. Avoid overwatering.
- Humidity Dome: Use the top half of the bottle as a mini greenhouse to retain moisture and warmth, if applicable.
5. Transplanting Seedlings (If Needed)
- Thinning: Once seedlings have a few true leaves, thin them out by removing weaker ones, leaving the strongest seedling.
- Transplanting: If the bottle becomes too small, carefully transplant the seedling to a larger container or directly into the garden. Minimize root disturbance to avoid shock.
6. Care for Growing Bell Peppers
- Watering: Maintain consistent soil moisture, but avoid waterlogging. Bell peppers do not tolerate completely dry soil.
- Fertilizing (Optional): After the plant is established, feed it with a balanced fertilizer every 2-4 weeks to boost growth and fruiting.
- Support: As plants grow, they may need support. Use a small stake or stick and gently tie the stem to it.
7. Harvesting
- Harvest Time: Bell peppers are ready to harvest when they have reached their full size and color. Use a sharp knife or scissors to cut them from the plant, leaving a short stem attached.
- Enjoy: Freshly picked bell peppers can be used in your favorite recipes or stored for later use.
Conclusion
Growing bell peppers from seeds in recycled plastic bottles is an easy and sustainable way to garden, even in small spaces. By following these steps, you can enjoy homegrown bell peppers while contributing to environmental sustainability. Whether you have a small balcony or a sunny windowsill, this method makes it possible for anyone to grow fresh produce at home.

