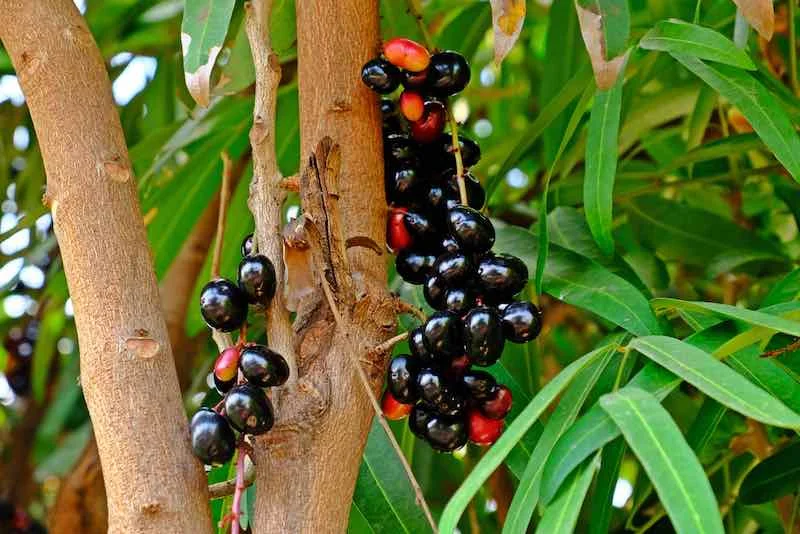
Java Plum (Syzygium cumini), also known as Jamun, is a tropical fruit tree renowned for its delicious, purple-black fruits and medicinal properties. Propagating Java Plum from seeds is a rewarding process that requires attention to detail. Here’s a step-by-step guide to help you grow Java Plum from seeds successfully.
Materials Needed
- Java Plum seeds (fresh or properly stored)
- Potting mix (a blend of compost, sand, and soil)
- Small pots or seed trays
- Water
- A sunny location or grow light
Step-by-Step Guide
1. Seed Preparation
- Obtain Seeds:
- Collect seeds from ripe Java Plum fruits. Choose seeds from healthy, mature fruits for the best results.
- If purchasing seeds, ensure they are from a reputable source.
- Clean the Seeds:
- Remove the seeds from the fruit and clean off any remaining pulp.
- Rinse the seeds under running water to ensure they are free of residue.
- Pre-Soaking (Optional):
- Soak the seeds in water for 24 hours to soften the seed coat and improve germination.
2. Prepare the Potting Mix
- Create a Mix:
- Prepare a potting mix that is well-draining. A suitable blend consists of equal parts compost, sand, and loamy soil.
- Fill small pots or seed trays with this mix.
- Moisture Check:
- Ensure the potting mix is moist but not waterlogged.
3. Plant the Seeds
- Sow the Seeds:
- Plant the seeds about 1 inch deep into the potting mix.
- Space seeds 2-3 inches apart if planting multiple seeds in the same container.
- Cover and Water:
- Lightly cover the seeds with potting mix.
- Water gently to moisten the soil.
4. Germination and Growth
- Create a Warm Environment:
- Place the pots in a warm, sunny location or under a grow light. Java Plum seeds require temperatures between 70-85°F (21-29°C) to germinate.
- Keep the soil consistently moist but not soggy.
- Monitor for Germination:
- Germination typically occurs within 3-6 weeks. Look for small sprouts emerging from the soil.
- Transplanting Seedlings:
- Once seedlings develop 2-3 sets of leaves and are large enough to handle, transplant them into larger pots or directly into the garden.
5. Transplanting to the Garden
- Choose the Right Location:
- Select a sunny spot with well-draining soil. Java Plum trees thrive in full sun and require good drainage.
- Prepare the Soil:
- Enrich the soil with compost or aged manure to improve fertility.
- Plant the Seedlings:
- Dig a hole that is twice the width of the root ball of the seedling.
- Place the seedling in the hole, ensuring that the top of the root
ball is level with the soil surface. Backfill the hole with soil and water thoroughly.
6. Ongoing Care
- Watering:
- Keep the soil consistently moist, especially during the tree’s initial growth phase. Reduce watering frequency as the tree matures, but ensure it receives sufficient moisture during dry periods.
- Fertilization:
- Apply a balanced, slow-release fertilizer during the growing season (spring and summer). Follow the manufacturer’s instructions for application rates.
- Pruning:
- Prune the tree to maintain a central leader and remove any damaged or crossing branches. This encourages a strong structure and improves air circulation.
- Pest and Disease Control:
- Monitor for common pests such as aphids and scale insects. Use organic insecticides or neem oil if necessary.
- Ensure good air circulation and avoid overwatering to reduce the risk of fungal diseases.
- Mulching:
- Apply a layer of organic mulch around the base of the tree to retain soil moisture, suppress weeds, and regulate soil temperature.
7. Harvesting
- Fruit Development:
- Java Plum trees typically start producing fruit in 3-5 years from seed. The fruit matures in late summer to early fall.
- Harvesting:
- Harvest the fruit when it turns a deep purple-black color and is slightly soft to the touch. Gently twist or cut the fruit from the tree.
- Post-Harvest:
- Enjoy the fruit fresh or use it in jams, juices, and desserts. Store any excess fruit in the refrigerator for short-term use or freeze for longer storage.
Conclusion
Growing Java Plum from seeds is a gratifying endeavor that yields a fruit tree with numerous benefits. With proper care and attention, your Java Plum tree will thrive and produce delicious fruits. Follow this guide to ensure successful germination, growth, and harvesting, and enjoy the satisfaction of cultivating this unique and valuable plant.
