DIY Automatic Plant Watering System: A Simple Guide
Worried about your plants while you’re away? This DIY automatic watering system is a practical and effective way to ensure your plants stay hydrated. With minimal materials and effort, you can create a system that keeps your green friends happy and healthy. Here’s how to make your own automatic plant watering system using items you probably already have at home.
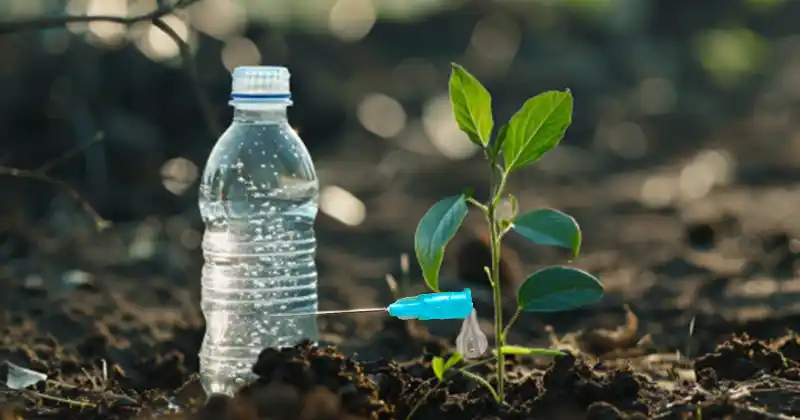
What You’ll Need:- **Plastic Bottle** (2L or larger): Size depends on how long you’ll be gone and the water needs of your plants.
– **Syringe Needle**: To control the water flow.
– **Plastic Q-tip** (Hollow inside): This will help regulate air flow into the bottle.
– **Glue**: To seal the connections and make them airtight.
– **Scissors or Knife**: For cutting the plastic Q-tip.
– **Optional: Drill or Sharp Tool**: For making precise holes.
Step-by-Step Guide
1. **Prepare the Bottle Cap:**
– **Modify the Q-tip:** Cut one end of the plastic Q-tip to create an open tube. This tube will allow air to flow into the bottle and regulate water release.
– **Drill a Hole in the Cap:** Make a small hole in the center of the plastic bottle cap. The hole should be just large enough to snugly fit the cut end of the Q-tip.
– **Insert and Seal the Q-tip:** Push the cut end of the Q-tip through the hole in the cap until it’s about half an inch inside the bottle. Apply glue around the area where the Q-tip meets the cap to ensure an airtight seal. The cotton end of the Q-tip will help control air flow and water release.
2. **Set Up the Water Flow:**
– **Insert the Syringe Needle:** Near the bottom of the bottle, carefully insert the syringe needle. Make sure the sharp end is inside the bottle. This will serve as the water outlet.
– **Fill the Bottle with Water:** Fill the bottle with water. The size of the bottle will determine how much water your system can hold and how long it will last.
3. **Activation and Maintenance:**
– **Place the Bottle:** Position the bottle next to your plant with the syringe needle pointed towards the soil. The gravity-fed system will release water slowly as air enters through the Q-tip.
– **Test the System:** Before leaving, test the watering system for a day to ensure it works properly. Adjust the position of the needle if the water drips too quickly or too slowly. Fine-tuning may be necessary to get the right drip rate.
Tips for Success:
– **Adjustable Drip Rate:** If the water flow is too fast or slow, adjust the size of the hole or the needle’s position to regulate the drip rate.
– **Bottle Size:** For longer vacations, use a larger bottle or multiple bottles to ensure your plants get enough water.
– **Monitor and Test:** Always test the system before relying on it for an extended period. It’s better to address any issues beforehand.
This DIY automatic watering system is not only practical but also cost-effective. It allows you to enjoy your vacation without worrying about your plants. With a bit of preparation and testing, you can ensure that your green friends stay well-hydrated and healthy while you’re away. Happy gardening and safe travels!